Home / Blog / Compress without losing quality
How to Compress Images Without Losing Quality
Every compressed image loses something. The real goal is to lose only what nobody can see. This guide shows a practical way to compress images without visible loss of quality: what to change first, which settings to use, and how to check the result before you save it.
Lossy and lossless compression in plain English
Lossless compression keeps every pixel exactly. PNG works this way, so nothing is lost, but the savings are modest, especially for photos. Lossy compression, used by JPG and WebP, throws away detail the eye is unlikely to notice. That is what makes files dramatically smaller. So “without losing quality” really means “without visible loss”, and the skill is knowing how far you can go before people can tell.
The five-step method
- Start from the original. Never compress a copy that has already been compressed. Every pass loses detail again.
- Resize to the size you will use. This is the biggest saving and the least visible one.
- Choose the right format. JPG or WebP for photos, PNG or WebP for screenshots and transparent graphics.
- Pick a quality of 75–85% for photos. Go higher for fine text and sharp edges.
- Compare at 100% zoom. Check the places where loss shows first, then save.
Resize first: the biggest win
A 4,000 × 3,000 pixel photo has 12 million pixels. If it will be shown 1,200 pixels wide, it only needs about 1.1 million, roughly one eleventh of the data. Shrinking the picture to the size you need removes detail nobody would ever see on that screen, so it is almost free in terms of visible quality. Lowering the quality slider is the second step, not the first.
A practical quality scale
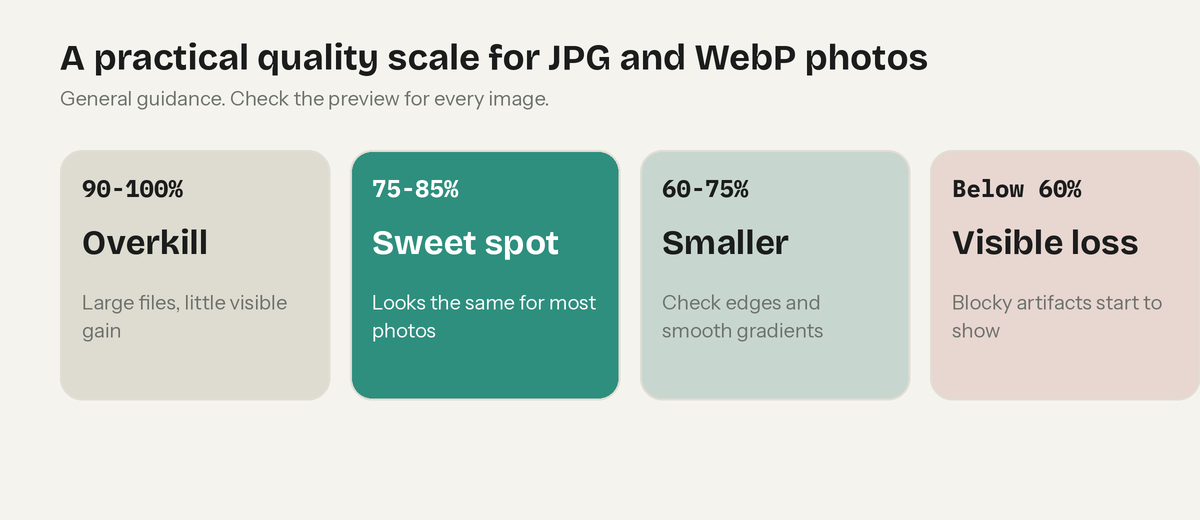
For most photos, 75 to 85% is the sweet spot: files are far smaller and the difference is hard to spot. Going above about 90% mostly adds file size. Below roughly 60%, blocky patches called artifacts begin to appear.
Pick the right format
- Photos: JPG, or WebP for websites.
- Screenshots with text and graphics with sharp edges: PNG, or high-quality WebP.
- Transparent logos: PNG or WebP. JPG cannot be transparent.
Our guide to JPG vs PNG vs WebP explains the trade-offs in detail.
How to check the result
- Zoom to 100%. Do not judge from a shrunken preview.
- Look at text and sharp edges. They blur and gain halos first.
- Check smooth gradients. Skies and walls can show banding or blocks.
- Check faces and dark areas. Skin can look waxy and shadows can turn blocky.
- View at real size. If it looks fine at the size people will see it, it is fine.
Lytepic shows the original and compressed versions side by side with the new file size, which makes this check quick.
Compress with Lytepic
- Open Lytepic and drop in your image.
- Lower the width to the size you will use.
- Set the quality to around 80%, or type a target size.
- Compare the previews, adjust, and download.
If you have a hard limit to meet, the target size box finds the best quality that fits. See the guides for 100KB and 200KB.
A quick recipe by use
| Use | Resize to | Quality | Format |
|---|---|---|---|
| Website or blog photo | 1,000–1,400 px wide | 75–80% | WebP or JPG |
| Photo to share in chat or email | 1,200–1,600 px on the long edge | 75–85% | JPG |
| Photo with fine text | Original size or close to it | 85–90% | JPG, WebP or PNG |
| Form with a size limit | 600–1,200 px | Target size | JPG |
Common mistakes
- Compressing the same file repeatedly. Quality drops each time. Keep a master copy.
- Lowering quality before resizing. Resize first, because it hurts the picture less.
- Saving photos as PNG. The files are huge for no visible gain.
- Judging by file size alone. A smaller file that looks worse is not a win. Always look.
- Enlarging small images. It increases size without adding detail.
Frequently asked questions
Can I compress an image with no quality loss at all?
Only with lossless compression, such as PNG, which keeps every pixel but saves less, especially for photos. For large savings you need lossy compression, and the aim is to make the loss invisible.
What quality setting is visually lossless?
There is no exact number. For many photos 85 to 90% is very hard to tell from the original, and 75 to 85% is often fine. Check the preview for each image.
Does resizing reduce quality?
It reduces the number of pixels. If you shrink the image to the size it will actually be shown at, the loss is not visible, and it saves far more space than lowering quality.
Should I compress the same image more than once?
No. Each lossy save discards more detail. Keep the original and create each smaller version from it.
Why does my compressed image look blocky?
The quality is probably too low, or the target size is too small for the amount of detail. Raise the quality, reduce the dimensions, or choose a simpler image.